If you are interested in nail art but feel like you lack the skills, water marble nails are the perfect place to start. This fun nail technique looks complex but is surprisingly easy once you practice. The best part? You don’t need to be the beauty of water marbling lies in the random, one-of-a-kind designs it creates on each nail.
In this guide, you’ll learn what water marble nails are, the supplies you need, and a complete step-by-step tutorial to master the look at home.
What Are Water Marble Nails?
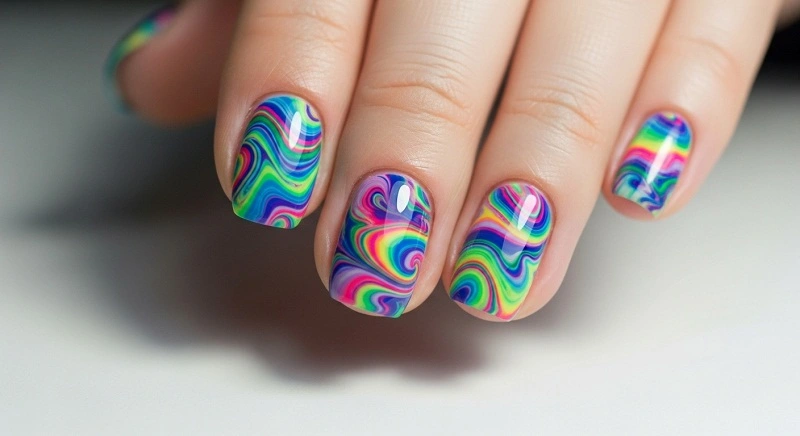
Water marble nails are a creative manicure technique where drops of nail polish are dripped into room-temperature water, swirled into a pattern, and then transferred to your nails by dipping. The result is stunning swirls, floral effects, or even psychedelic designs that look salon-quality.
This nail art style originated in Japan and became popular worldwide in the 1990s. Today, it’s a trending DIY technique on Instagram, TikTok, and Pinterest because of its unique results and endless color combinations.
Supplies You’ll Need
Before you start, gather these basic items:
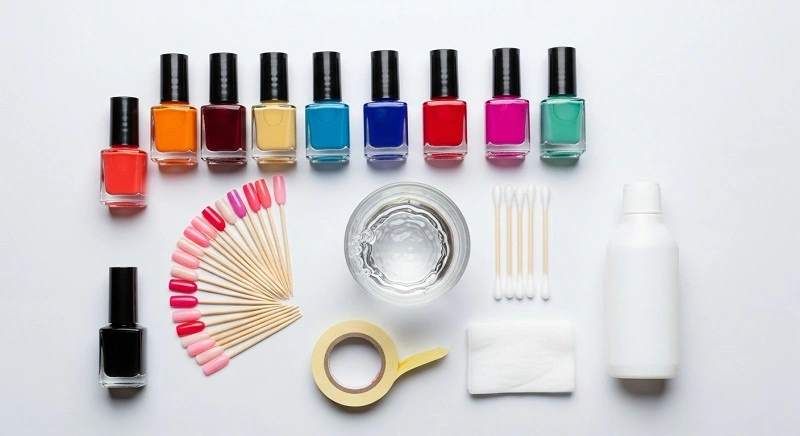
- A cup or bowl of room-temperature water (big enough for your fingers).
- 2–4 nail polish colors (contrasting shades work best).
- White base nail polish.
- Base coat & top coat.
- Toothpick, orange stick, or nail art tool.
- Scotch tape, liquid latex, or Vaseline (to protect skin).
- Cotton swabs & nail polish remover (for cleanup).
Pro Tip
Step-by-Step Water Marble Nail Tutorial
Follow these steps for perfect water marble nails at home:
1. Prep Your Nails
Start with clean nails. Apply a thin base coat, followed by 1–2 coats of white nail polish until opaque. A white base makes the marble design pop.
2. Protect Your Skin
Wrap scotch tape around your fingers or apply liquid latex/Vaseline around the cuticles. This step reduces the mess and makes cleanup much easier.
3. Prepare the Water Cup
Fill a small cup with room-temperature water. Avoid cold or hot water, as polish won’t spread properly.
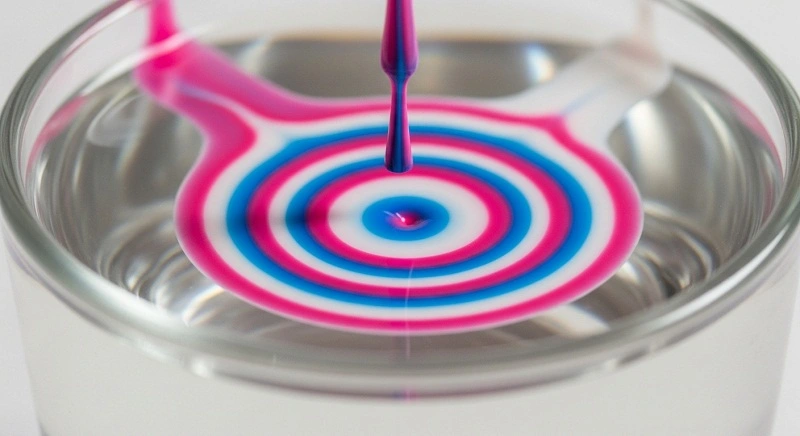
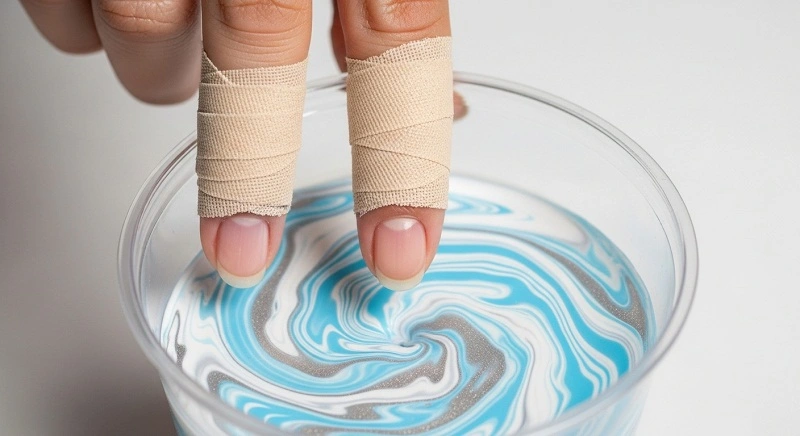
4. Add Nail Polish Drops
Open your first nail polish and let a drop fall into the water’s surface it should spread into a ring. Continue alternating colors, dropping one inside the other until you form several concentric circles.
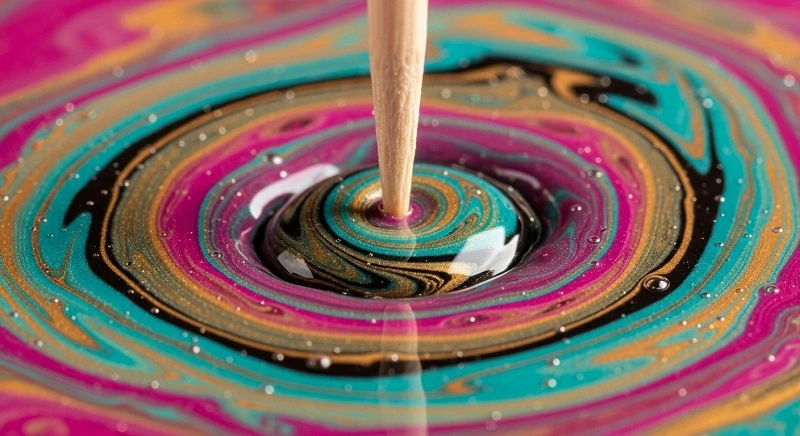
5. Create a Design
Using a toothpick or orange stick, drag gently through the polish to form swirls, zigzags, or flower patterns. Work quickly to avoid drying.
6. Dip Your Nail
Position your nail over the design you like. Slowly dip your nail into the water, keeping it submerged. Use your toothpick to remove the leftover polish from the water’s surface before lifting your nail.
7. Let It Dry & Clean Up
Once you’ve marbled all nails, carefully remove the tape/latex. Use a cotton swab dipped in remover to wipe away any excess polish around the edges.
8. Fix Imperfections
If bubbles appear or spots are missing, use a small brush with polish to touch up.
9. Seal the Design
Finish with a clear top coat to add shine and protect your marble design from chipping.
Pro Tips & Troubleshooting
- If the polish won’t spread, the water might be too cold or the polish too thick. Always use room-temperature water and newer polishes.
- Design dries too fast? Work quickly and avoid fans or breezes.
- Messy edges? Use liquid latex instead of tape for cleaner results.
- Colors look muddy? Stick to 2–3 contrasting shades instead of too many.
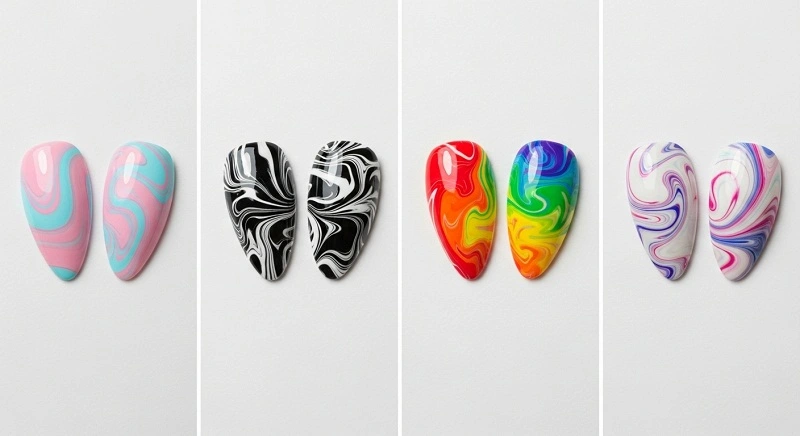
Popular Water Marble Nail Design Ideas
- Pastel Swirls: perfect for spring.
- Rainbow Ombre: bold, colorful summer vibes.
- Black & White Marble: classic and chic.
- Glitter Accents: add sparkle for parties.
- Seasonal Themes: orange/black for Halloween, red/green for Christmas.
Aftercare & Maintenance
- Apply cuticle oil daily to keep nails hydrated.
- Avoid harsh cleaning products without gloves.
- Refresh your top coat every 2–3 days for longer wear.
Common Mistakes to Avoid
- Using warm or cold water instead of room temperature.
- Forgetting to protect skin before dipping.
- Using old, thick nail polishes.
- Skipping the step of cleaning the polish from the water surface before lifting your nail.
FAQs About Water Marble Nails
Conclusion
Water marble nails are a fun, creative, and affordable DIY nail art technique that anyone can master. Each design is unique, and with a little practice, you’ll be creating salon-worthy manicures at home.